Sunday, June 26, 2011

Praying for You- Two More Challenges!

Hi Stampers!  

I created this card using the colors from this week’s CQC90 ColourQ Challenge and the  SC338 Splitcoast Stamper’s sketch.

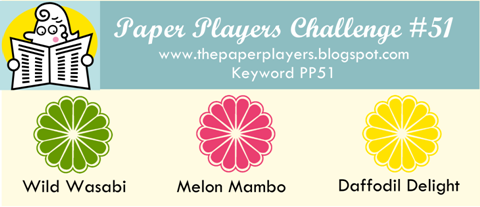
The colors are bright and vibrant, so  I decided to re-work a design that I had created in an earlier post using the soon to be retired Hostess Set, Fast and Fabulous.

I love this stamp set- all it took to create this card was a bit of stamping, markers and masking, a few die cuts and embossing with the Big Shot and the card was finished!  If you need more information on how to create this card, please let me know (it is getting late:-))

Stamp Sets:   Fast and Fabulous, Thoughts and Prayers, En Francais
Ink:  Brilliant Blue, Poppy Parade, Bashful Blue, Markers- Bashful Blue and Tempting Turquoise
Cardstock:  Whisper White, Bashful Blue, Brilliant Blue, Poppy Parade 

Accessories:  Big Shot, Vintage Wallpaper EF, 3 ½” Circle Die, Scallop Circle Die, Brayer, Sanding Block, Medium Oval Punch, Scallop Trim Border Punch, Sponge, 5/8” White  Satin Ribbon, Bold Brights Button (retired) 

Thanks again for visiting- I hope all of you have a wonderful week and a chance to stamp!

Saturday, June 25, 2011

Celebrate- Three Challenges in One!

Hi Stampers!  

I created this card in celebration of July 4th.    I decided to combine three challenges- the PP52 Clean and Simple (CAS)Sketch from The Paper PlayersHSSFJ72 Stars and Stripes Challenge at Hand Stamped Sentiments and the CAS99 Stars Challenge at Pals Paper Arts.   I modified the sketch a bit, but that is what sketch challenges are all about- using the sketch to inspire your creativity:-)

If you have time to visit each of the challenge sites, each of their Design Teams have created such beautiful projects and with all of the other entries- endless ideas! 
 
As for me, I love anything patriotic- the feelings of pride for our country, our flag, our heritage and our military.   With the anniversary of our independence as a nation soon upon us, we are again reminded that freedom comes at a cost and we should be thankful for those who serve our nation to keep us free!

This card was very easy to make using a few punches, Big Shot with a few dies and one embossing folder.
Stamp Sets:  Fabulous Phrases
 Ink: Night of Navy
Cardstock:  Whisper White, Cherry Cobbler, Night of Navy
Accessories:  Big Shot, Square Lattice EF, Dies- Star, 3” Circle, 3 ½” Circle, Punches- Large Star (soon to be retired), 2 ¾” XL Circle, Word Window, Modern Label, 5/16” Handheld, Star Brads (retired)


Thanks again for stopping by- I hope all of you are having a great week and continue to give thanks for our freedom!

Wednesday, June 22, 2011

Farewell to Three Favorites!

Hi Stampers! 

I love this week’s CCMC155 sketch challenge at Create with Connie and Mary! Connie and Mary and their Design Team has done a fabulous job (as always) and if you have time, you will be truly inspired!  

I decided to use the colors from the CC327 Splitcoast Stampers Challenge- Vanilla, Chocolate, Olives and incorporate three of the soon to be retired sets into one card-  Sense of Time, Simple Friendship and Bella Toile (reminder- the last day to order these sets will be June 30th).   
This was a fun card to make- I hope you like it! :-)

To create this card:

Stamp the Bella Toile background stamp with Chocolate Chip ink onto Very Vanilla and Old Olive.  Tear the Very Vanilla layer and distress the edges of both piece and sponge with Chocolate Chip ink.

Stamp the clock image in Chocolate Chip onto Very Vanilla.  Cut out the clock image and re-moisten the ink on Bella Toile ("huff" on the surface) and place the clock image onto the background stamp.  Distress the edges of the clock with the Distressing Tool and sponge with Chocolate Chip ink.

Stamp the sentiment with Chocolate Chip ink onto Very Vanilla and punch out with the Modern Label Punch (press the sentiment into the re-moistened background stamp as described above).  Sponge Chocolate Chip ink over the edges to “antique” the image and tone down the Very Vanilla.

Angle showing the clear embossed areas
Lay the clock image and the sentiment face down into the Versamark ink pad to cover the entire piece with ink.  Apply Clear Embossing powder to both pieces and use the Heat Gun to melt the powder.  

Layer a piece of Chocolate Chip (punched from the Modern Label Punch) behind the sentiment and add a pearl on the exposed end. 

Use the Decorative Label XL Punch to punch out two Chocolate Chip pieces  and emboss with the Square Lattice EF (these were punched from my scrap stash and were already embossed).  The layer with the Pinking Hearts border was also from my scraps- already punched, embossed with the texture plate and sprayed with Shimmer Paint (again, love my scraps! :-)).

Assemble the background layers and spray with Frost White Shimmer Paint (mixed with 70% alcohol).  Attach the clock image and sentiment after spraying the background  (I have found that the Shimmer Paint does not dry very well over the powder embossing).
Create the bow with Chocolate Chip Satin Ribbon (retired) and an Antique Brad to finish off the card.
Stamp Sets: Bella Toile, Sense of Time, Simple Friendship
Cardstock: Chocolate Chip, Old Olive, Very Vanilla
Ink: Chocolate Chip, Versamark
Accessories: Big Shot, Square Lattice EF, Clear EP, Heat Gun,  Punches- Pinking Hearts Border, Decorative Label XL, Modern Label, Pearls, Frost White Shimmer Paint, Sponge Dauber, Antique Brad, 1” Chocolate Chip Satin Ribbon (retired)


Thank you for taking the time to visit my blog!  You are all such an encouragement to me and even though we have not met in person, I feel that you are "true friends"!  Have fun stamping and God Bless!

Sunday, June 19, 2011

CQC89- Two CAS Cards

Hi Stampers!  

I love this week’s colors for the CQC89 Challenge at the ColourQ and had an opportunity to stamp this afternoon, so I created two Clean and Simple (CAS) cards using these colors.
 
The first card utilizes the SSCSC71 Sketch Challenge on the Stampin’ Connection (you need to be a SU! demonstrator to have access to this challenge) and the second card is designed using the Splitcoast Stamper’s SC337 Sketch Challenge.

Once I chose the stamp sets , the cards were fairly quick to create and assemble.

Card #1- Sneak Peek - This card uses a floral stamp from the new Hostess set, Simply Soft.  Stamp the image using Basic Gray onto Whisper White and color with SU! Markers in Crajun Craze and Bordering Blue (retired color).  Stamp the sentiment with Cajun Craze and punch out with the Decorative Label XL Punch.  

Emboss the Bravo Burgundy layer with the Finial Press EF, punch a border on the Cajun Craze DSP layer (from the Patterns Designer Series Paper Stack) using the Pinking Hearts Border Punch and attach to a Basic Gray card front.  

Lightly spray all panels with Champagne Mist Shimmer Paint and attach the stain ribbon (from my stash, but I cannot wait until you see all of the colors of ribbon in the new catalog:-).  Adhere the sentiment and focal panel and attach the tailored bow.

This card seemed to be lacking something, so I decided to pull out The Color Spritzer Tool to "spritz" card with Bravo Burgundy and here is the result.  Which one do you prefer- with or without the marker "spritz"?

Stamp Sets: Simply Soft, Teeny Tiny Wishes
Ink:  Basic Gray, Cajun Craze
Cardstock: Whisper White, Bravo Burgundy, Basic Gray, Cajun Craze DSP
Accessories: Big Shot, Finial Press EF, Decorative Label XL Punch, Pinking Hearts Border Punch, SU! Markers- Bravo Burgundy, Cajun Craze and Bordering Blue (retired), Color Spritzer Tool, Champagne Mist Shimmer Paint Spray, ribbon from my stash

Card #2:

On Whisper White, stamp the medallion from Artistic Etchings in Bordering Blue and Cajun Craze.  Stamp the Eiffel Tower in Basic Gray and distress the edges with the Distressing Tool.  Use a Sponge Dauber to lightly sponge with Basic Gray ink and mount onto a Basic Gray layer. 

Emboss a panel of Bordering Blue (retired) with the Big Shot and Vintage Wallpaper EF.  Attach this piece along with a piece of Cajun Craze DSP (from the same paper stack as Card #1) and lightly spray the background and focal image with Champagne Mist Shimmer Paint Spray.

Use the 2 3/8” Scallop Circle Punch to punch out a piece of Cajun Craze cardstock to create the rolled flower (see tutorial here).   

Stamp the sentiment in Cajun Craze and punch out with the Word Window Punch.  Layer onto a piece of Basic Gray punched with the Modern Label Punch.  Add the rolled flower with Mini Glue Dots and spray with Champagne Mist Shimmer Paint.
Adhere to the front of the card and attach the entire panel to a Whisper White card front. 

Stamp Sets: Artistic Etchings, Short and Sweet
Ink:  Bordering Blue (retired), Cajun Craze and Basic Gray
Cardstock: Bordering Blue, Cajun Craze DSP, Whisper White
Accessories: Big Shot, Vintage Wallpaper EF, Word Window, Modern Label and 2 3/8" Scallop Circle Punch, Champagne Shimmer Mist Paint Spray, Distressing Tool, Sponge Dauber, Pearl, ribbon from my stash

Thanks again for visiting and I hope all of you have a wonderful week! If you have a minute, let me know which one is your favorite:-)

Wednesday, June 15, 2011

Nature Walk Returns!


Hi Stampers!  

I created this card for this week’s  PP51 ColorChallenge at The Paper Players.  As you can see, the colors are bold and bright and possibly not the normal colors I would have paired together for my "Vintage" or "Shabby" style, but that is what I love about weekly challenges!  

The colors definitely remind me of summer so I decided to use the returning set, Nature Walk :-).  If you did not have a chance to purchase this set when it was in the Occasions Mini, you will be able to after July 1st :-)
 
As usual, ThePaper Players Design Team has done a fabulous job and they have several guest designers for this summer – if you have a chance, check out their site (you will love all of the inspiration)!
 
This card was fairly simple to make- cut out a few Top Notes, emboss a panel from DSP and sand, stamp the images, color and spritz with markers and sponge.  Add the ribbon and brad to finish it off!  Quick and easy- if you have any questions, please let me know. 

Stamp Sets:  Nature Walk, Thoughts and Prayers
 Ink: Basic Black, Melon Mambo, Daffodil Delight, SU! Markers- Melon Mambo and Wild Wasabi
Cardstock:  Whisper White, Wild Wasabi, Melon Mambo, retired DSP
Accessories:  Big Shot, Framed Tulips EF, Top Note Die, Sanding Block, Sponge Daubers, Color Spritzer Tool, 5/8” Daffodil Delight Satin Ribbon (soon to be retired), Antique Brad 

Thanks again for stopping by- I hope all of you are having a blessed week!   

Tuesday, June 14, 2011

CAS Sympathy- Two Challenges and Sneak Peek

Hi Stampers! 
 
I decided to create a Clean and Simple cards using the CCMC154 colors from this week;s Create withConnie and Mary Challenge and the SSC207 Sketch at Stamping411.  I love both of the weekly challenges at these sites and this week’s  Design Team samples as well as the other entries are superb!

To create this card:

Use the Big Shot to emboss a piece of Elegant Eggplant with the Vintage Wallpaper EF and spray it with Frost White Shimmer Paint (mixed with 70% alcohol).

Stamp the floral image (sneak peek) in Basic Black onto Whisper White and using a Blender Pen, color with River Rock and Melon Mambo ink.  Use the Color Spritzer Tool with an Elegant Eggplant marker to spritz the floral image and punch the image out with the 2 ½” XL Circle Punch.  Layer onto a piece of River Rock cut from the Big Shot with the 3” Circle Die.

Stamp the sentiment in Elegant Eggplant on Whisper White and punch out with the Medium Oval Punch.   Use the Modern Label with Melon Mambo for the layer behind the sentiment, adhere to the bottom of the circle and add the pearls.

Punch the River Rock layer with the Lace Border Punch (another sneak peek) and finish assembling the card.

Stamp Sets: Teeny Tiny Wishes, Simply Soft (sneak peek hostess set 2011-2012)
Cardstock: Whisper White, Elegant Eggplant, Melon Mambo and River Rock
Ink: Basic Black, Elegant Eggplant, Melon Mambo and River Rock
Accessories: Big Shot, Vintage Wallpaper EF, Punches- 2 ½” XL Circle, Medium Oval, Lace Ribbon Border Punch (sneak peek) , 3” Circle Die, Pearls, Frost White Shimmer Paint, Color Spritzer Tool, Elegant Eggplant marker

Happy Father's Day!

Hi Stampers!  

I wanted to share with you the card that I created for my Dad for Father’s Day (I pretty sure that he does not check my blog- if so, Dad, sorry I ruined the surprise:-)).   

My father loves the outdoors and is an avid hunter and fisherman, so I thought I would create a card that represents the world he loves so much.  

This week's  Pals Paper Arts PPA97 Challenge is Fashion Inspiration “Show Your Style”. I hope they mean your paper crafting/card making style (or at least that is what I am sharing) :-).   

It depends on my mood for the day, but I tend to feel more comfortable creating cards that have a distressed or vintage feel.  I love the Clean & Simple (CAS) style and try to create a CAS card occasionally, but I struggle with adding elements and seem to gravitate to creating cards with embossed images, sponged scenes and anything that seems to “age” the card a bit, so I guess my style would be classified as more of a  Vintage Style. 

I also used the SC297Sketch from Splitcoast Stampers- loved the simplicity of the layout and it seemed to suit the masculinity of the card.  

If you have a minute, take some time to check out both sites- the Pals Paper Art’s Design Team is just wonderful and Splitcoast has so many ideas- fair warning, you can spend hours on their site alone :-) !

To create this card:

Use the 1/38" Circle Punch to create a mask for the sun image ( I generally use a sticky note).  With the mask revealing the circle opening, use a Sponge Dauber with Daffodil Delight ink and sponge the circle for the sun onto Very Vanilla (VV).  Remove the mask and place the punched out circle portion over the Daffodil Delight.  Using Sponge Daubers with More Mustard, Pumpkin Pie and Cajun Craze ink continue to sponge ink over the sky area and lightly sponge a bit over the Daffodil Delight.

Repeatedly stamp the wheat stamp from Autumn Days in Early Espresso (also stamping off to give various tones to the wheat) and lightly sponge Early Espresso over the wheat stalks to tone down the VV.   

Stamp the leaf image around the top perimeter using Always Artichoke, Cajun Craze and Early Espresso.  Distress the sides of the image with the Distressing Tool and sponge Early Espresso over the edges.

Use the Big Shot with the Square Lattice EF to emboss a piece of Early Espresso and Always Artichoke DSP.  Attach the Early Espresso strips to the top and bottom of the focal image and insert the brads (from the retired Antique Brass Hardware Kit).
Lightly sand the Always Artichoke embossed panel and sponge Early Espresso over the white core areas.

Use a brayer to apply Early Espresso ink to the Vintage Wallpaper EF (apply the ink to the flat side of the EF) and emboss a piece of Cajun Craze and More Mustard.

Stamp the sentiment and a few leaves onto VV and punch out the sentiment layer with the 1 3/8” Circle Punch (sponge More Mustard over the VV to tone down the brightness of the cardstock).  

Use the Sponge Daubers with More Mustard, Always Artichoke and Early Espresso to “pounce” color onto the pheasant stamp.  Stamp onto VV and cut the image out.  Apply additional Early Espresso over the edges and color the eye area with a Cherry Cobbler SU! Marker.  Lightly spray Champagne Shimmer Mist onto the pheasant and adhere to the scene with a glue stick.  

Assemble the layers and attach the Natural Hemp Twine over the Always Artichoke layer to finish off the card.

Stamp Sets:  Autumn Days , Teeny Tiny Wishes
 Ink: Always Artichoke, Daffofil Delight, Cajun Craze, Pumpkin Pie, Early Espresso, More Mustard
Cardstock:  Very Vanilla, Always Artichoke DSP, Cajun Craze, Early Espresso, More Mustard
Accessories:  Big Shot, Square Lattice and Vintage Wallpaper EF, Brayer, Antique Brass Brads, 1/16” Handheld Hole Punch, 1 3/8” Circle Punch, Natural Hemp Twine, Sponge Daubers, Champagne Mist Shimmer Paint Spray

I had fun making this card and I hope my Dad likes it.  I am so thankful that he is still alive and pray that he will have many more days to enjoy the outdoors and the wildlife that he loves so much! 

Thanks again for stopping by- have fun stamping!     

Sunday, June 12, 2011

CQC88 Emerging Color Birthday Card

Hi Stampers! 

I wanted to create a card using the luscious colors from this week’s ColourQ Challenge- they are so rich and elegant!  

I was so excited to receive my sneak peek items from the 2011-2012 SU! Catalog and wanted to play with some of the new sets, so I decided to use Delicate Doilies along with one of my favorite background stamps, Medallion.  I also decided to use one of my favorite techniques, Emboss Resist along with another technique called Emerging Color (see the Splitcoast Stampers tutorial for this technique).     

Also, please forgive the image of this card- I find it very difficult to obtain a good picture of a card with any type of red ink.  This card looks much better in real life :-)

To create this card:

Ink the doily stamps with Crumb Cake, Soft Suede, Early Espresso and Cherry Cobbler and stamp repeatedly on a piece of Very Vanilla to create your own designer paper- here I used a 4 ¼” x 5 ½” piece of Very Vanilla (A2) size, but you could use stamp an entire piece of 8 ½” x 11”, trim to the A2 size and use the remainder to create many other cards with the One Sheet Wonder (OSW) technique.  

De-static the stamped images with the Embossing Buddy and ink the Medallion background stamp with Versamark and stamp the Medallion image towards the edge of the paper (right over the doilies).  Apply Clear Embossing Powder (EP) and heat emboss with the Heat Gun. 

Allow the embossing to cool and use a Sponge Dauber with Cherry Cobbler and apply ink over the embossed image and remaining cardstock.  Use another Sponge Dauber with Early Espresso and apply over the Cherry Cobbler.  With a slightly damp paper towel, gently rub off the ink on the embossed area.

Spray the entire focal panel with Champagne Mist Shimmer Paint (mixed with 70% alcohol) and trim to fit the front of the card (allowing for additional layers). 

Mount onto a piece of Early Espresso (bottom half embossed using the Big Shot with the Vintage Wallpaper EF).  Punch a piece of Very Vanilla with the new Lace Ribbon Border Punch and lightly sponge Crumb Cake ink over the border to soften the Very Vanilla.

Attach the border below the focal panel and adhere a piece of Early Espresso 5/8” Stain Ribbon over the gap on the card front.  Create  a tailored bow and attach with Mini Glue Dots.  

Stamp the sentiment with Cherry Cobbler ink onto Very Vanilla cardstock and punch out with the Large Oval Punch.  Ink the Medallion background stamp (center only) first using the Crumb Cake Sponge Dauber (pounce the ink onto the stamp), then Cherry Cobbler and followed by Early Espresso.  Lightly stamp off using a piece of scrap and then stamp over the sentiment.  Sponge the edges of the oval with Crumb Cake, spray with Champagne Mist Shimmer Paint and attach to the front of the card.

Mount onto a Cherry Cobbler layer, then onto the Very Vanilla card front.

Stamp Sets:   Medallion, Delicate Doilies, Sincere Salutations
Ink:  Crumb Cake, Cherry Cobbler, Early Espresso, Soft Suede, Versamark
Cardstock:  Very Vanilla, Cherry Cobbler, Early Espresso
Accessories:  Big Shot, Vintage Wallpaper EF, Embossing Buddy, Clear EP, Heat Gun, Large Oval Punch, Lace Ribbon Border Punch, Sponge Daubers, 5/8” Early Espresso Satin Ribbon, Champagne Mist Shimmer Paint 

Thanks again for visiting- I hope all of you have a blessed week!

Thursday, June 9, 2011

Thank You- Two Challenges and Scraps! :-)


Hi Stampers! 
Today I decided to create a card from scraps :-)  I had a piece of the embossed panel left over from my previous post on June 7th and I thought it would be the perfect size for the SSC206 sketch at Stamping 411 .  My friends at The Paper Players were having a PP50 Kind Thanks Challenge this week and you can never have enough ‘Thank You” cards, so I decided to combine the two challenges.   
Again, the Design Teams at both sites have created some wonderful examples and the other entries are gorgeous! 

To create this card:

Mount the previously stamped and heat embossed panel to Night of Navy (again, see previous post for instructions on how to create this panel).  Even though I did not use Peach Parfait ink on the panel, the overlapping colors of the More Mustard and Cherry Cobbler seemed to create a color close to Peach Parfait and I thought they would look good together.

Use the Big Shot with the Square Lattice EF and emboss the end of the Peach Parfait cardstock and flip it over to emboss the other side (leaving a flat panel in the area for the vertical portion of the sketch).  
Ink the script stamp from French Foliage with Night of Navy and stamp repeatedly in the non-embossed area of the card front.  Punch the edges of a few scraps of Night of Navy with the Scallop Border Punch and apply a scrap strip of Peach Parfait in the center.

Stamp the sentiment in Night of Navy on Peach Parfait and punch out with the Decorative Label XL Punch.  Mount onto a layer of Night of Navy (punched with the Decorative Label XL Punch and trim off the edges).  Adhere the sentiment behind the focal image and mount the focal image to the card front with Dimensionals. 

Lightly spray the entire card front with Champagne Mist Shimmer Paint (mixed with 70% alcohol) and attach the bow with a Mini Glue Dot.   

Mount the entire panel onto Night of Navy to finish off the card.

Stamp Sets:  French Foliage, Short and Sweet
Ink:  Night of Navy, also More Mustard, Cherry Cobbler and Versamark- to create leaf panel (see previous post on June 7th for instructions)
Cardstock: Whisper White, Night of Navy, Peach Parfait
Accessories:  Big Shot, Square Lattice EF, Decorative XL Label Punch, Scalloped Edge Border Punch, 5/8” Night of Navy Satin Ribbon, Champagne Mist Shimmer Paint Spray, Leaf Panel- Heat Gun, Clear Embossing Powder, Embossing Buddy, Sponge Daubers, Brayers.

Thanks again for visiting and I hope that you are having a great week stamping!

Tuesday, June 7, 2011

Thinking of You- Masculine Card

Hi Stampers!  

I love the color combination for this week's Pals Paper Arts PPA96 Masculine Color Challenge and decided to combine these colors with the CCMC153 sketch from Create with Connie and Mary.  
If you have a minute, take some time to check out both sites- their Design Team samples and all of the entries are fabulous- you will be so inspired!   

One thing I love about sketch challenges is that you are encouraged to modify them a , such as turning it on it's side, etc. and I decided to flip this one and have the panels in the landscape format versus portrait.  
To create this card:

Using two brayers- one with More Mustard and other with Cherry Cobbler ink, apply the ink in a random pattern onto a piece of Whisper White cardstock (if you do not have two brayers, one will do- just apply the lightest ink first and "roll" off the ink onto scrap paper before re-inking in the darker ink).  If you do not have a brayer, Sponge Daubers or sponges would work as well:-)

Use the Embossing Buddy to "de-static" the cardstock and stamp the images from French Foliage in Versamark ink.  Apply Clear Embossing Powder (EP) and emboss with the Heat Gun.  

Use a Sponge Dauber with Cherry Cobbler ink and apply Cherry Cobbler over the embossed areas.  Repeat the steps above and stamp more leaves onto the cardstock.  

Apply more Cherry Cobbler ink and with a separate Sponge Dauber, apply Night of Navy as the final step.  With a damp paper towel, gently wipe off the ink from the embossed areas.  Mount the panel onto Night of Navy and Cherry Cobbler.  

I just love the emboss resist technique!  Would you have ever guessed that the center panel was originally Whisper White? :-)

Use the Big Shot with the Square Lattice Embossing Folder (EF) to emboss a piece of Night of Navy cardstock and More Mustard DSP.   Cut the More Mustard DSP into strips and adhere to the Night of Navy background.  

Use the Crimping Tool to crimp a piece of Cherry Cobbler and Night of Navy (scraps work great for this) and adhere over the More Mustard panels. 

Stamp the sentiment with Night of Navy onto More Mustard, use the Word Window Punch and mount with an Antique Brad onto the embossed leaf panel. Position the leaf panel to finish off the card.

Stamp Sets:  French Foliage, Teeny Tiny Wishes
 Ink: Versamark, Cherry Cobbler, More Mustard, Night of Navy
Cardstock:  Whisper White, Cherry Cobbler, Night of Navy, More Mustard DSP
Accessories:  Big Shot, Square Lattice EF, Brayer, Crimping Tool, Embossing Buddy, Heat Gun, Clear EP, Antique Brad, 1/16” Handheld Hole Punch, Word Window Punch, Sponge Daubers

Thanks again for stopping by- I hope all of you have a terrific week!    
Related Posts Plugin for WordPress, Blogger...