Sunday, February 26, 2012

Love and Sympathy- Two in One!


Hi Stampers!! 

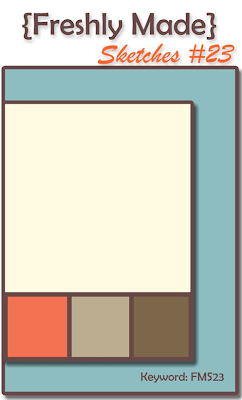
I wanted to create a Clean 
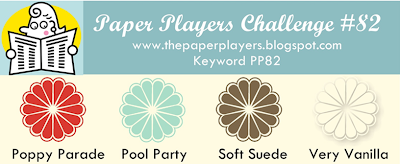
and Simple (CAS) card using the CQC125 ColourQ Challenge colors along with the FreshlyMade FMS23 sketch.  

I hope you have the time to check out the Design Team samples from each site along with all of the other entries- they are all fabulous!  


To create this card:

Color the floral image using Stampin’ Write markers (Lucky Limeade and Baja Breeze) and stamp onto Whisper White cardstock.  Distress the edges with the Distressing Tool and layer onto Lucky Limeade (distressing the edges of this layer as well).

Use the Big Shot™ with the Vintage Wallpaper Textured Impressions™ Embossing Folder to emboss two pieces of Basic Gray cardstock.

Punch out two pieces of Baja Breeze cardstock with the 1” Square Punch and one piece from Lucky Limeade cardstock.  Emboss all three with the Square Lattice Textured Impressions™ Embossing Folder. 

Punch three flowers using the Boho Blossoms Punch, run through the Crimper Tool and add the center of each square with a Copper Brad.

Add the Satin Ribbon bow, sentiment and punched border to finish off the card. 

Stamp Sets:  Love and Sympathy

Ink: Basic Gray, Stampin’ Write Markers- Baja Breeze, Lucky Limeade

Paper: Whisper White, Basic Gray, Baja Breeze, Lucky Limeade

Accessories:  Big Shot™, Square Lattice and Vintage Wallpaper Textured Impressions™ Embossing Folder, Crimper Tool, Distressing Tool, Punches- XL Oval, 1” Square, Boho Blossom, Eyelet Border;  Copper Brads, 5/8” Satin Ribbon (from my stash)

Thanks again for stopping by- I hope you have a wonderful week! 

Friday, February 24, 2012

Sunset Inspired Masculine Card


Hi Stampers!   

This card was inspired by a sunset that I witnessed the other day leaving from work.  The sun had almost completely set and the dusky clouds contrasted against the coral sky and it was gorgeous!  God’s handiwork never ceases to amaze me….

I decided to try to recreate the scene using a sponged background along with this week’s PP83 CAS Masculine challenge at The Paper Players.  If you have not visited their site yet, check out all of the great examples- they outdid themselves again!


If the card looks plain, I apologize in advance :-)  I decided to wait to add the sentiment since it may be appropriate for many occasions - Birthday, Thinking of You, Get Well, Sympathy…

To create this card:

Using a Sponge Dauber with Peach Parfait Classic Ink lightly sponge the ink along the bottom of a piece of Whisper White cardstock.  Add the clouds in the same manner with Basic Gray.

Stamp the tree line with Versamark™ ink and heat emboss using the Heat Tool and Stampin’ Emboss® Black Embossing Powder. 

Layer onto Basic Black cardstock and again onto Basic Gray (that has been embossed with the Big Shot™ and the Stripes Textured™ Impressions Embossing Folder).   Tear and distress the edge of the Basic Gray layer. 

Mount the focal image, add the 5/8” Black Satin Ribbon bow and adhere to the Whisper White card base (front panel embossed with the Herringbone Textured™ Impressions Embossing Folder). 

Clean and Simple card and oh, what fun!  

Stamp Sets:  Lovely As A Tree

Paper: Whisper White, Basic Gray, Basic Black

Ink: Peach Parfait, Basic Gray, Versamark™

Accessories:  Big Shot™, Textured Impressions™ Embossing Folders- Stripes, Herringbone, Heat Tool, Stampin’ Emboss® Black Embossing Powder, Sponge Daubers, 5/8” Black Satin Ribbon

Thanks again for stopping by and I hope you enjoyed this quick easy card!  I think I will have too make a few more of them for my masculine "stash" :-)  

Have a blessed weekend and try to "squeeze" some time for stamping!

Sunday, February 19, 2012

Vintage Sketch- Two in One!


Hi Stampers!

Finally a chance to spend some time creating this evening!  I decided to use the ColourQ CQC124 colors along with the Stamping 411 SSC243 Sketch Challenge to create a fun, vintage style card!

If you have the time, check out both sites for great inspiration! 


To create this card:

Ink the background stamp, Hello Doily with Versamark™ Ink and stamp onto Pool Party cardstock.  Apply Stampin’ Emboss® White Embossing Powder and heat with the Heat Tool.   Ink the background stamp, En Francais with Poppy Parade Classic Ink and stamp over the embossed doily – gently wipe off the excess ink from the embossed image.

With the 2 ½” Circle Punch, punch out a piece from the Everyday Enchantment DSP and layer two Decorative Labels from Poppy Parade (cut in half) behind the circle.   Emboss the circle  with the Big Shot™ and Square Lattice Textured Impressions™ Embossing Folder. 

Attach a 5/8” Pool Party Seam Binding Ribbon.  Create the rolled flowers from Poppy Parade, Pool Party and Pretty in Pink cardstock using 1 3/8” and 1 ½” Circle Punches along with the Crimper Tool.

Assemble the layers, add the pearls to the flowers to finish off the card.

Stamp Sets:  Hello Doily, En Francais, Short & Sweet

Ink: Poppy Parade, Versamark™

Paper: Whisper White, Pretty in Pink, Poppy Parade, Pool Party, Everyday Enchantment DSP

Accessories:  Big Shot™, Square Lattice Textured Impressions™ Embossing Folder, Crimper Tool, Heat Tool, Stampin’ Emboss® White Embossing Powder,  Punches-2 ½” Circle, 1 3/8” Circle, 1 ½” Circle,  Decorative Label, Word Window, Scallop Trim Border;  5/8” Pool Party Seam Binding,  Pearls 

Thanks again for stopping by- I hope you have a blessed week! 

Wednesday, February 15, 2012

CAS Everyday Enchantment- A Color and Sketch Challenge!


Hi Stampers!   

My husband and I just finished watching the 136th Westminster Kennel Club Dog Show this evening (it is our annual Valentine’s Day tradition) and I know, I should be sleeping but I have not had time to create this week and desperately need to spend time in my craft room (I have been working very long hours at my full-time accounting job :-)))

I decided to unwind and take the time to create a quick CAS card using Ann’s PP82Color Challenge from The Paper Players along with the CCMC188 Sketch fromCreate with Connie and Mary.    Again both sites have so much inspiration!  

Since this card has very little stamping- mostly the  Big Shot™ with three embossing folders, the new Framelits™ Labels Collection along with the new Blossom Punch- quick and easy! 

To create this card:

Hand cut the banner from the Everyday Enchantment Designer Series Paper (from the SAB catalog) and layer onto Soft Suede cardstock (hand cut around the banner shape, use the Distressing Tool along the edges and emboss with the Finial Press Textured Impressions™ Embossing Folder).   Lightly sand with the Sanding Block and adhere the bow.

Use the Big Shot™ with the Framelits™ Labels Collection to cut a label from the same DSP as the banner and Soft Suede cardstock.  Emboss the Soft Suede label (as well as the DSP for the background) with the Square Lattice Textured Impressions™ Embossing Folder. 

Layer the labels onto the card front, add the flower (created with the Blossom Punch from Pool Party cardstock and embossed with the Perfect Polka Dots folder),  adhere the center of the flower and add pearls along with the tiny labels to finish off the card.

Stamp Sets:  Tiny Tags

Paper: Poppy Parade, Soft Suede, Very Vanilla, Everyday Enchantment Designer Series Paper (SAB 2012)

Ink: Poppy Parade

Accessories:  Big Shot™, Textured Impressions™ Embossing Folders- Finial Press, Square Lattice and Perfect Polka Dots, Framelits™ Labels Collection, Sanding Block, Punches- Blossom, 1” Circle, Jewelry Tag; 5/8” Pool Party Seam Binding, Brad, Pearls
Thanks again for stopping by and I hope you enjoy this quick easy card!  Have a great week and I hope you have fun stamping! 

Tuesday, February 14, 2012

Happy Valentine's Day! Simple Cards created with a Great Friend


Hi Stampers! 

I had the opportunity to spend several hours with a good friend on Saturday and we created eleven Clean and Simple (CAS) Valentines for the children in her life.  

She is a beginner stamper and loves the Big Shot so I decided to focus on embossing folders, the new Framelits™ dies and punches.

We needed four different designs (so that there would not be a duplicate card sent to the kids in the same family) and even though the majority of the cards were for boys, we still added pink and hearts…she said that her one eldest male grandchild has a T-shirt that states “Real Men Wear Pink” so we decided that they could handle the pink hearts :-))…

Cards for the "Girls":


Cards for the "Boys":


I hope you enjoy these cards- they could be modified using current Designer Series Paper and ribbon (with another theme they would be excellent for "Stamp A Stacks" or beginner classes)..

We had a great time creating these and I am looking forward to our next get-together (she is the "hostess with the mostess" and we will be having more classes in the future)..

Stamp Sets: Teeny Tiny Wishes

Paper:  Early Espresso, Pretty in Pink, Whisper White, Basic Black, Real Red, retired SU! Valentine DSP

Accessories:  Big Shot™, Framelits™ Hearts Collection, Textured Impressions™ Embossing Folders- Square Lattice, Perfect Polka Dots, Adorning Accents (Heart), Crimper Tool, Punches- Full Heart, Eyelet Border, Word Window, Modern Label, Satin Ribbon- from my stash  

Sunday, February 12, 2012

Two Challenges- One Challenging Color Combo!


Hi Stampers!! 

This week’s ColourQCQC123 Challenge colors definitely remind me of the 70’s again- I do believe that retro is in and aren’t those owls cookies cute? I must admit, I did struggle a bit with this color combination but in the end decided to combine it with the Stampin’ Queen’s SQSC25 Sketch Challenge (again, both sites offer so much inspiration and you should see what the Design Teams created!)..


This card was definitely quick and easy once I determined the design :-)

Ink the French Filigree background stamp with Regal Rose Classic Ink and stamp onto Whisper White cardstock, emboss with the Big Shot™ and the Square Lattice Textured Impressions™ Embossing Folder. 

Attach the two lengths of White Satin Ribbon and mount onto the Regal Rose cardstock base.

With the Big Shot™ and the Framelits™ Labels Collection, cut a frame from Regal Rose cardstock and Peach Parfait Designer Series Paper (retired Hostess pack).  Emboss both with the Big Shot™ and the Pefect Polka Dots Textured Impressions™ Embossing Folder.
 
Use the Blossom Punch (love this new punch!) and punch a flower from Poppy Parade Designer Series Paper (I used a piece from a retired Hostess Pack) and run through the Crimper Tool.  Layer with a center created with the Boho Blossom Punch from Peach Parfait cardstock and add a Pearl to the center.

Attach the flower to the embossed label layer, add the bow and little tags to finish off the card.

Stamp Sets:  French Filigree, Tiny Tags

Ink: Regal Rose, Poppy Parade

Paper: Whisper White, Regal Rose, Peach Parfait, Poppy Parade and Peach Parfait Designer Series Paper (retired Hostess Pack)

Accessories:  Big Shot™, Framelits™ Labels Collection, Square Lattice and Perfect Polka Dots Textured Impressions™ Embossing Folder, Crimper Tool, Punches-Boho Blossom, Blossom, Jewelry Tag, White Satin Ribbon (from my stash),  Pearls 

Thanks again for stopping by- I hope you have a wonderful week! 

Sunday, February 5, 2012

Mixed Bunch- 2 Different CAS Cards- 3 Challenges


Hi Stampers! 

I wanted to create a few CAS cards with the new stamp set, Mixed Bunch and decided to utilize a few of my favorite weekly challenges.  I had fun making these cards- I hope you like them!

The first card uses the FMS20 Sketch from Freshly Made Sketches “Going Long” along with the JAI103 Color Challenge at Just Add Ink.  If you have the time, check out both of these sites- the Design Team samples as well as the other entries are wonderful!

This card was quick and easy- embossing with the Textured Impressions™ Embossing Folder, add some DSP, layered cardstock, ribbon,  heat embossed flower and pearls to finish off the card.

Stamp Sets:  Mixed Bunch, Blessings from Heaven

Cardstock: Whisper White, Real Red, Real Red DSP (retired Hostess Pack)

Ink:  Versamark™, Real Red

Accessories:  Big Shot™, Square Lattice Textured Impressions™ Embossing Folder, Embossing Buddy®, Heat Tool, Stampin’ Emboss® Red Embossing Powder (retired), Blossom Punch, 5/8” Real Red Satin Ribbon (retired), Pearls


The second card is a simple Black and White study using the Stampin’ Queen’s SQSC24 Sketch.  This site provides a weekly challenge that is very unique and creative- they have a fabulous design team with a lot of inspiration!  I hope you have a chance to check them out as well…

Again, this card only requires a few embossing folders, a die cut, a few punches, heat embossed flower, ribbon and pearls to finish off the card.  

Stamp Sets:  Mixed Bunch, Tiny Tags

Cardstock: Whisper White, Basic Black

Ink:  Versamark™, Basic Black

Accessories:  Big Shot™, Scallop Circle Bigz™ Die, Textured Impressions™ Embossing Folders- Perfect Polka Dots, Square Lattice, Snowburst, Embossing Buddy®, Heat Tool, Stampin’ Emboss® Black Embossing Powder, Punches- 3” Circle, Jewelry Tag, Blossom;  Silver Brad, 5/8” White Satin Ribbon, Pearls

Thanks again for taking the time to visit and I hope you have a great week!

Thursday, February 2, 2012

Love You- Three in One!


Hi Stampers!   

I finally had a chance to be creative again this evening and decided to participate in this week’s PP80 Sketch Challengewith The Paper Players (love the sketch Anne Marie!) along with the colors from this week's CQC122 ColourQ Challenge and the Stampin' Royalty SR109 “Valentine's Day- It's All About Love” Theme Challenge.  Again, if you have the time, please stop by each of these sites and check out all of the fabulous inspiration!

To create this card:

Emboss a piece of Crumb Cake using the Big Shot™ with the Elegant Bouquet Impressions™ Embossing Folder and a piece of Real Red Designer Series Paper with the Finial Press Impressions™ Embossing Folder.  Lightly sand the Real Red layer and stamp  the background stamp from Charming with Crumb Cake ink lightly over the Crumb Cake layer.

Use Stampin’ Write markers to color the floral image (I used Real Red, Regal Rose and Basic Black) and stamp onto Whisper White cardstock.  Emboss with the Big Shot™ and the Designer Label (Oval) Frame Textured Impressions™ Embossing Folder.  Carefully cut around the edge and layer onto a piece of Basic Black cardstock (cut with the Framelits™ Labels Die. 

Punch out a few flowers with the Boho Blossom Punch from Real Red and Basic Black cardstock, add the 5/8” Black Satin Ribbon, Pearls and sentiment to finish off the card.

Stamp Sets:  Charming, Short and Sweet

Paper: Basic Black, Crumb Cake, Whisper White, Real Red DSP

Ink: Basic Black, Stampin’ Write marker s- Basic Black, Real Red, Regal Rose

Updated version- added ribbon, pearls and a few more flowers 
Accessories:  Big Shot™, Textured Impressions™ Embossing Folders- Elegant Bouquet, Finial Press, Designer Label (Oval) Frame, Framelits™ Labels Die, Sanding Block, Mediium Oval Punch (retired), Boho Blossoms Punch, Pearls, 5/8” Black Satin Ribbon


***** UPDATED VERSION *****


I decided to add additional pearls, ribbon and flowers to add more "pizzazz":-)


If you have the time, let me know which one you like better....


Thanks again for stopping by- I hope you enjoy this card and the rest of your week- God Bless!
Related Posts Plugin for WordPress, Blogger...